> ## Documentation Index
> Fetch the complete documentation index at: https://docs.dojoapps.co.uk/llms.txt
> Use this file to discover all available pages before exploring further.
# Import Guide
> How to upload your shipping rates to Shopify.
Importing a CSV is the fastest way to set up or update your shipping rates. Instead of entering rates one by one in Shopify, you can upload hundreds of rates at once using a spreadsheet file.
## Before You Import
**Important:** Importing a file will **overwrite** all existing rates in the selected shipping zone. Always [export a backup](/export-guide) of your current rates before importing a new file.
Before you start, make sure your file is formatted correctly. Shopify requires specific column names and values to correctly process your rates.
* Review the [Spreadsheet Reference](/spreadsheet-reference) for required columns and data types.
* Ensure your file is saved as a **.csv** (Comma Separated Values) file.
* You can create new zones directly through your spreadsheet; rows sharing the same zone name will be automatically grouped together.
## The Import Process
Follow these steps to upload your shipping rates to Shopify.
Log in to your Shopify Admin and navigate to **Apps** > **MatrixRates Import/Export**.
Click on the delivery profile you want to manage (e.g., "General Profile"). This will show a list of shipping origins (locations) where you can import or export rates.
Find the location where you want to add rates and click the **Import Rates** button.
Click the **Add file** button in the popup and select your spreadsheet file from your computer.
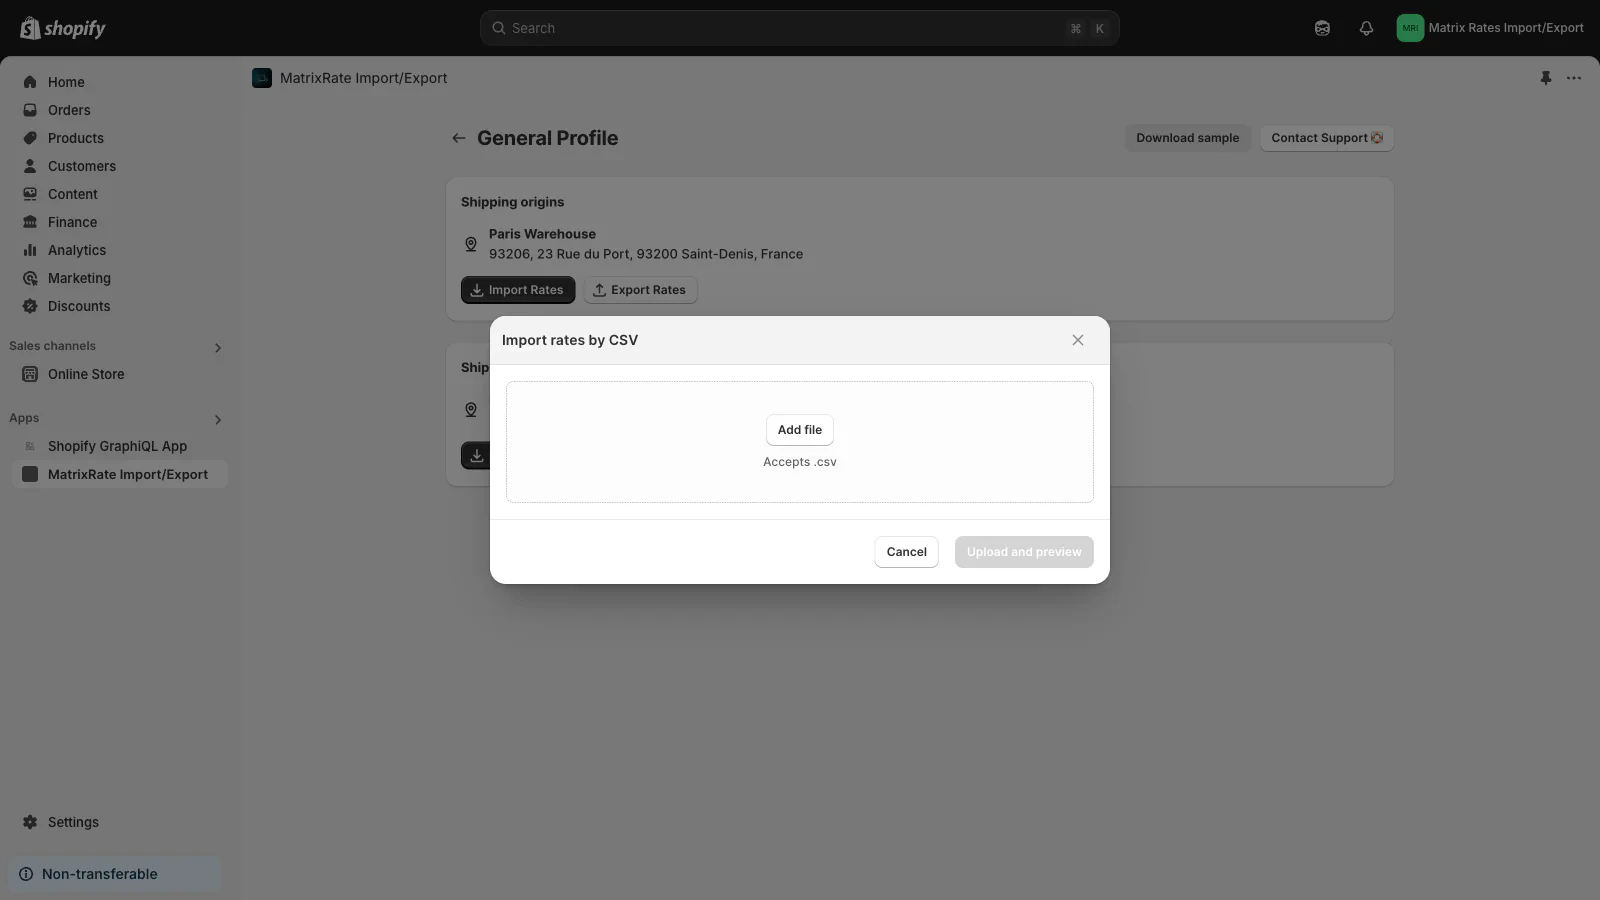 Click the **Upload and preview** button. The app will process your file and show you a summary of the rates and zones to be imported.
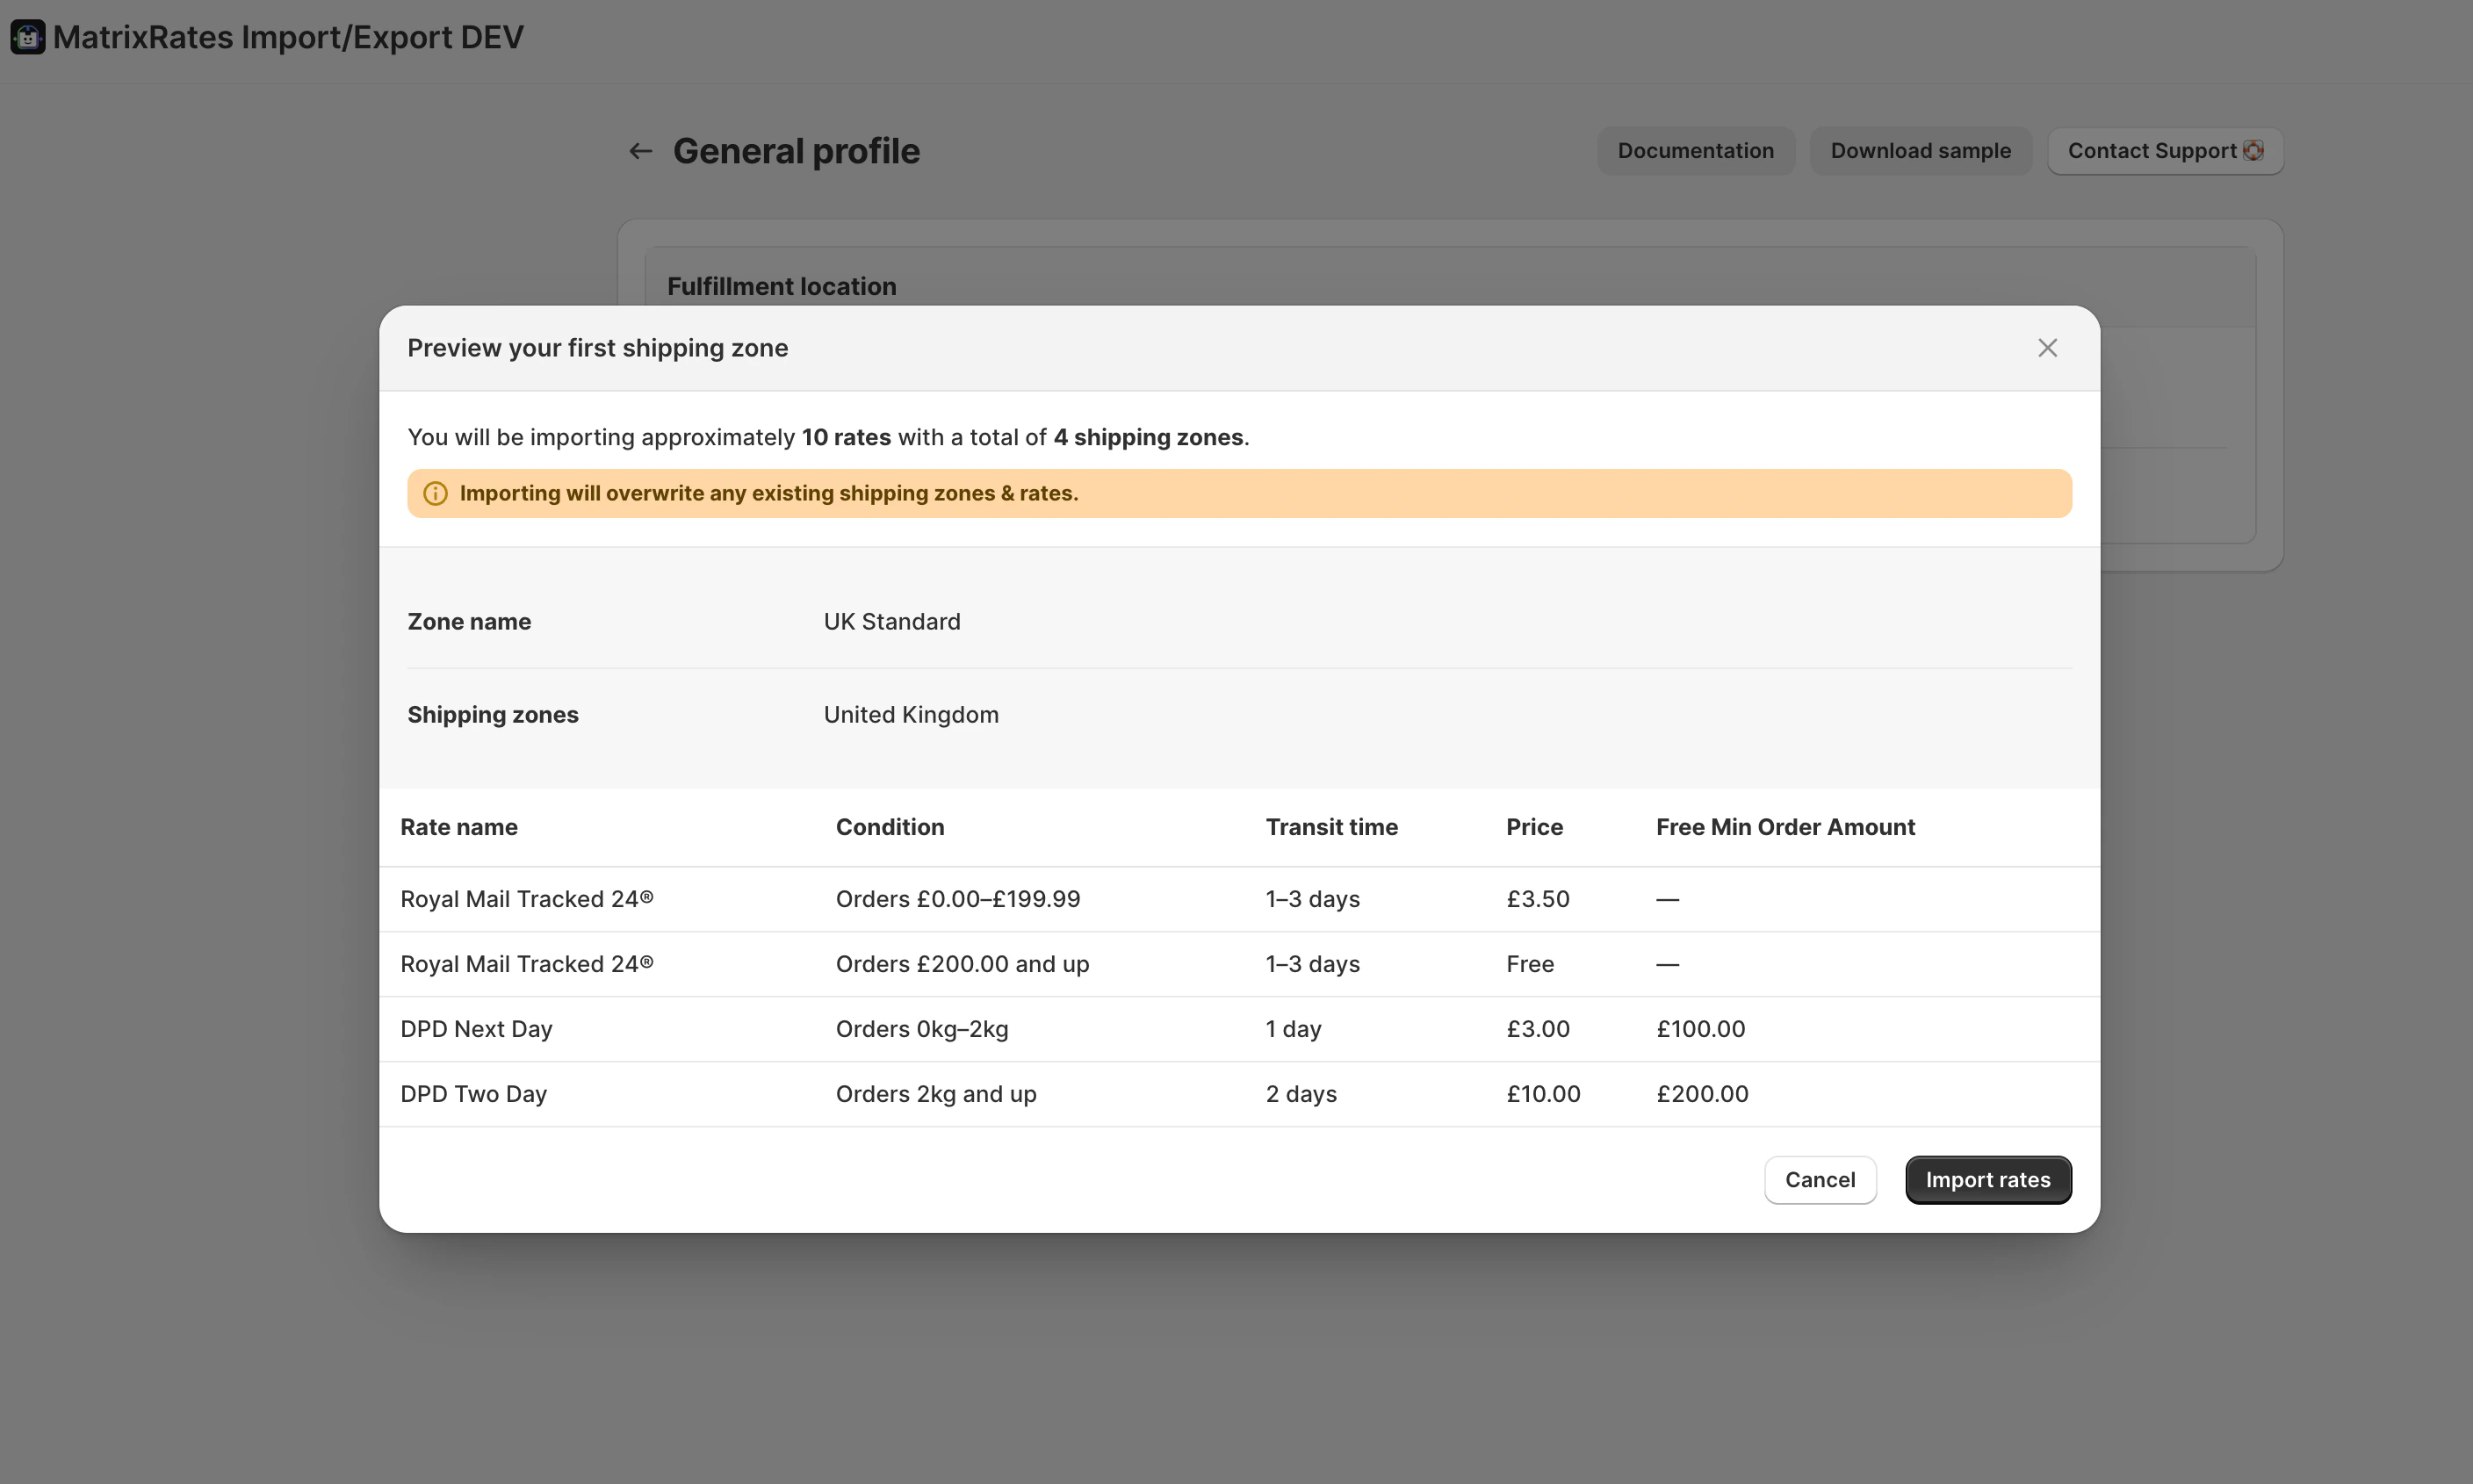 The preview screen shows approximately how many rates and shipping zones will be created. It also warns you that this action will overwrite existing shipping zones and rates for that location.
Review the preview to ensure everything looks correct, then click the **Import rates** button to finalize the process. Once complete, you will see a success message.
## Verifying the Import
After a successful import, it's good practice to verify that your rates are correctly loaded into Shopify.
1. Go to **Settings** > **Shipping and delivery** in your Shopify Admin.
2. Under **Shipping profiles**, select the profile that contains the shipping location you just imported your rates to.
3. Scroll down to see your new shipping zones and rates listed under that location.
4. To test your rates in action, act as a customer: add items to your basket and proceed to checkout using the addresses you configured.
**Postcode and City filters:** Any postcode or city restrictions configured in your spreadsheet will not be visible within the Shopify Admin shipping settings. These rules are applied automatically during checkout. To verify they are working, you must test them by proceeding to checkout on your store's frontend.
## What to do next
Add items to your cart and go to checkout to see your new rates in action.
Getting an error message? Learn how to fix common import issues.
Keep a copy of your rates on your computer for safekeeping.
The preview screen shows approximately how many rates and shipping zones will be created. It also warns you that this action will overwrite existing shipping zones and rates for that location.
Review the preview to ensure everything looks correct, then click the **Import rates** button to finalize the process. Once complete, you will see a success message.
## Verifying the Import
After a successful import, it's good practice to verify that your rates are correctly loaded into Shopify.
1. Go to **Settings** > **Shipping and delivery** in your Shopify Admin.
2. Under **Shipping profiles**, select the profile that contains the shipping location you just imported your rates to.
3. Scroll down to see your new shipping zones and rates listed under that location.
4. To test your rates in action, act as a customer: add items to your basket and proceed to checkout using the addresses you configured.
**Postcode and City filters:** Any postcode or city restrictions configured in your spreadsheet will not be visible within the Shopify Admin shipping settings. These rules are applied automatically during checkout. To verify they are working, you must test them by proceeding to checkout on your store's frontend.
## What to do next
Add items to your cart and go to checkout to see your new rates in action.
Getting an error message? Learn how to fix common import issues.
Keep a copy of your rates on your computer for safekeeping.